Friday, 31 May 2013

Ice Cream Cake Pops


After his first attempt of no-bake cake pops my little brother, BroMi embarked on another adventure to make these super cute ice cream cake pops. He used a guide which can be found on Cakegirls. Basic instructions are as follows:
  1. Melt some yellow candy melts and paint the cone area with a paint brush (see photo of cake pop mould below).
  2. Put this in the fridge for 5 minutes and then go over with a second layer to cover any gaps, put in fridge again.
  3. Melt the white candy and paint the ice cream area as well as going over the yellow cone area, repeat with a second layer as described above.
  4. Once set, press the cake mixture into the ice cream and cone leaving a gap of about 5 mm from surface.
  5. Coat the tip of a cake pop stick with candy melt and push it into the cake or I found it easier to place the stick in and put some cake on top of it.
  6. Spoon more melts over the cake layer to fill it up. Even it out and place into fridge until set.
  7. Once set remove from mould. Use a paint brush to put piping gel over the areas you want sprinkles and then sprinkle them on!


Friday, 24 May 2013

No-Bake Cake Pops!


I've always wanted to try making cake pops ever since Miss T created these delicious treats, but they look so tedious and the thought of making a cake just to break it up seems so backwards to me. Recently, my little brother decided to re-ignite his love for baking (yes, it runs in the family) and created these fabulous no-bake cake pops! How is it possible that they are no-bake you ask? Well, you buy a cake, crush it up, mix with ready made butter cream and roll it. And there you have it, no-bake cake pops. Then you can focus all your attentions on decorating the cake pops, which is the fun part! These ones were covered in rainbow sanding sugar from Sugar Shack. If only my brother wasn't living on the other side of the world in London, I would devour these little beauties!! Mi xo

Sunday, 12 May 2013

Tiramisu


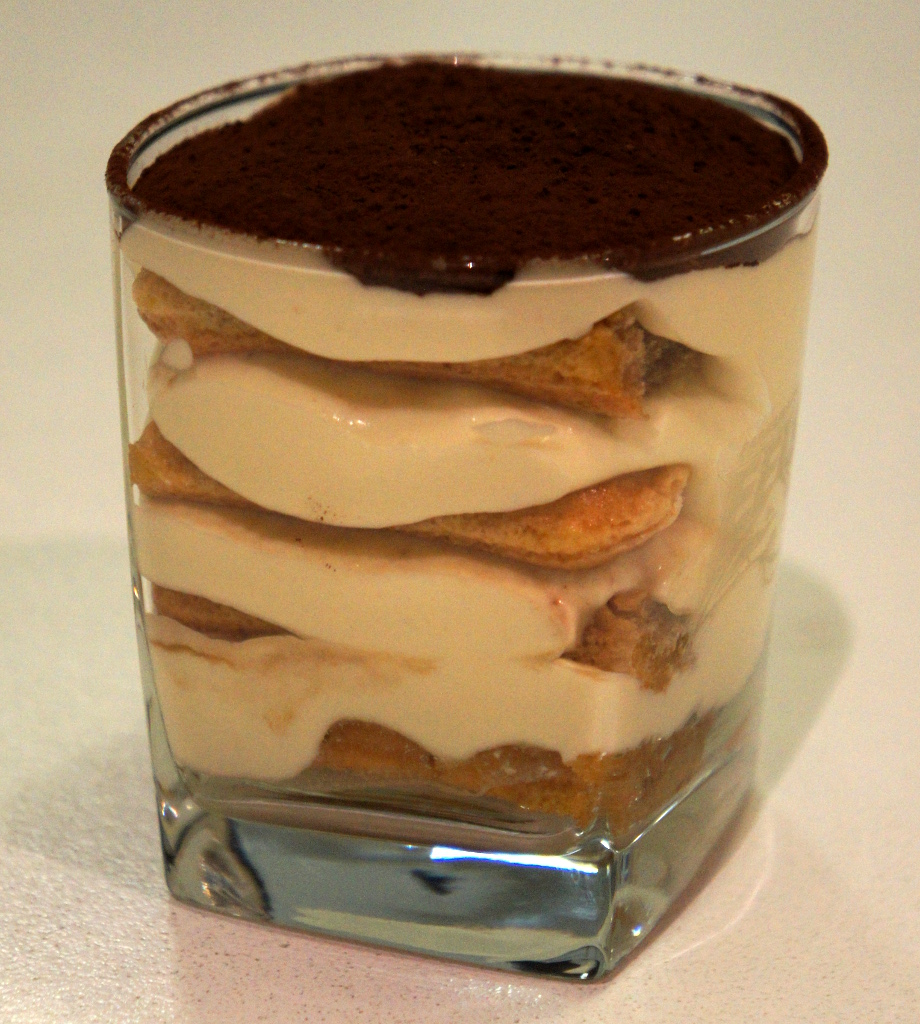
Happy Mother's Day to all the mummies out there! This year marks my very first Mother's Day!! My mum who lives interstate came to visit us on the weekend and I wanted to make something delicious for her...it also had to be something relatively easy that I could make in advance and whilst wearing a baby. :) A while back Miss T made us some yummy tiramisu and so I asked her for the recipe. This recipe can also be found here. I pretty much followed the recipe, except added 1 teaspoon of vanilla extract to the mascarpone mixture for extra flavour. I also took the advice from reviewers' comments and whipped the cream for a bit longer until soft peaks formed (but not all the way). I used a 19 x 19 cm square dish and about 30 sponge fingers (savoiardi) or 3/4 of a 400 g packet. As I had some leftover biscuits and coffee/marsala mixture, I constructed two mini-tiramisu in a glass (see photo below). The layers can be seen more easily when sliced as seen above, although mine did not look quite as neat as the original image...I like to think of it as rustic. The mini-tiramisu was used as a taste tester, it definitely tasted better the next day when the flavours had time to soak through the sponge. Overall, a good recipe that was super-easy to make and delicious! Mi xo

P.S. For those who are super-observant, yes, the side of the glass has "Eels" written on it. They belong to Mr Mi!


Wednesday, 8 May 2013

Cheesecake Brownies


I've been wanting to try this recipe for ages, it's from one of my favourites cook books David Lebovitz's Ready for Dessert. Life has been a bit chaotic lately and having a little one makes it difficult to put time aside to try a new recipe, but having him sleep in a hug-a-bub wrap has really saved my life. It gave me freedom to have both my hands free to bake! And boy have I missed baking!! Anyway, I volunteered to bake something for our weekly new parent's group and wanted to make something super-scrumptious. To me, baking for someone is the best way to show them you care, nothing pleases me more than seeing someone bite into a sweet morsel of goodness and smile with content. I pretty much stayed true to this recipe, except sprinkled some extra choc chips on top just because I could. I didn't have a square tin so had to use a larger rectangular one which meant the brownies were a bit flatter - more like a choc cheesecake slice I suppose. Nonetheless, they tasted delicious and moist in the centre much like black bottom cupcakes. If you love chocolate (and who doesn't) this is the cookbook for you! Mi xo